|
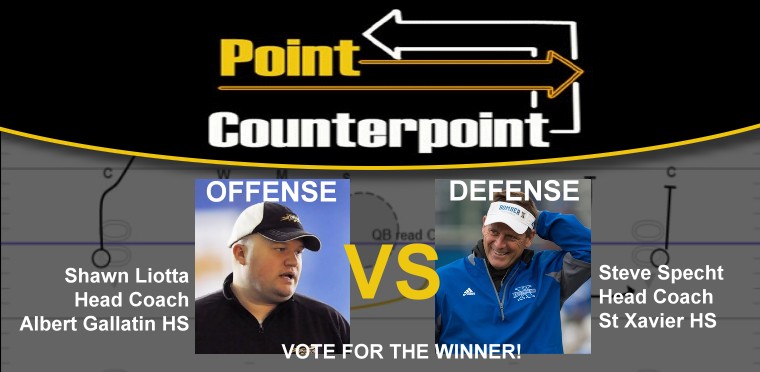
Point/Counterpoint: Play # 3 Third and Ten from the Opponents 30-Yard LineVoting Results
Offense
Votes: 533
Defense
Votes: 503

Point-Counterpoint Play # 3 Third and Ten from the Opponents 30-Yard Line
When facing the situation of 3rd and 10 from our opponents 30 yard line we will have the mentality that we will have two downs to gain the 10 yards needed for a first down. In this situation we will not be punting the ball from this field position and we are probably outside of our range for a reasonable field goal attempt. The goal will be to pick up the first down or to make our 4th down call more manageable. In this situation we will be expecting the defense to attack us in one of two manners. We have started to break into the fringe of the Gold Zone area which we classify as the 30 yard line and in. When reaching this area of the field and the long distance needed for a first down teams will usually attempt to either drop players into coverage or bring pressure. The first thing we would do in this situation would be to run our freeze tempo to attempt to get the defense to jump offside and we would gain a free five yards making a 3rd and five call much more manageable. If we do not get the defense to jump offside we would then make our play call based off of the defensive alignment. In this particular situation we are in our two back or Deuce formation (Diagram 1). The defense has countered with a closed coverage situation and have chosen to play coverage with extra defensive backs and a 32 interior box. Diagram 1
The first area we would look at is the perimeter boxes and the interior box for a numbers advantage. The defense has a numbers advantage on the perimeter to the two receiver side as well as a bracketed safety over our single receiver. In this situation we do not feel we have favorable odds on the perimeter. When we take a look at the interior box we recognize a five man box against our two back formation (Diagram 2). This would be a Nick call for our offensive line as we have recognized the five man box. In this situation we feel that we have a numbers advantage to be able to run the football, particularly with the mindset that we have two downs and do not need to pick up the first down on one play. By being patient in the run game we can exploit where we have a numbers advantage. Diagram 2 With a 3rd and long situation we want to give the offense the illusion that we are playing coverage. In this case we like to bring in our nickel and/or dime defenders in order to get more speed and better cover options on the field. As Coach has mentioned, we hold the numbers advantage in the passing game with 3 over 2 to the strength and 2 over 1 to the split side (Diagram 3) Diagram 3 In this defensive set we still have a myriad of options to utilize our Adjuster (A) in coverage, the run game, or in a blitz concept. We still give the illusion that we are 3 high safeties which eliminates a pre snap coverage read from the QB. We widen the Ends to a wider 5 technique in order to give them the edge as quickly as possible. Our goal is to stretch the OT pass pro as much as possible. By virtue of our alignment, the offense does have the numbers in the Box to run the ball but as mentioned in an earlier article, we need to make a decision on how we want to defend. In this case we feel good about giving them the numbers when they need to gain 10 yards for a first down. Keep in mind that field position, time remaining and in game tendencies will play a role in whether we adjust and bring more players into the box or simply bring pressure. In this case we will assume it is early in the game and on the offenses side of the field. We will play coverage, rush 3, play a ¼, ¼, ½ look and spy the QB with the Backers (Sick Em 4 Spy).
The play we are going to call is our inside zone read with Jet sweep action. Our single receiver to the play side will run off and block the playside corner. Our backside slot receiver will be running jet motion fake to the play side. On his jet fake he will be full speed to the mesh point, execute his fake and then get into a relationship with the quarterback for a potential pop-out if the quarterback pulls the ball off of the zone read. The backside inside receiver is going to attempt to get an inside release on the nickle defender and will run a quick slant flashing over the box. This will become an option for the quarterback off of the zone read if the Mike linebacker attacks downhill in run game (Diagram 4). The key to this route is the inside receiver must win inside and not get re-routed by the nickle defender aligned over top of him. Diagram 4 Our Nickel Back will always align to the strength of the formation. He will pattern read the #2 receiver; therefore the motion will carry him across the field and the strength is re-established. The Corner and $ will squeeze their alignment and the numbers game resets (Diagram 5). Diagram 5 Once motion has reestablished strength the defense called will adjust accordingly (Diagram 6) Diagram 6 The Nickel motion adjustment should eliminate the Jet sweep from the equation. The Weakside Corner should bump down over the #1 receiver and play a physical Funnel Flat technique that should eliminate the skinny slant. The frontside corner will be playing a deep ¼ which should eliminate the fade. What we hoped to eliminate from the passing game has been accomplished. The question remains whether we can stop the run since we have given them the numbers advantage. Again, because they need 10 yards we are good with this decision. Our offensive line will be executing our inside zone blocking scheme. Our center will make a Nick call pre-snap which will communicate the presence of a five man box pre-snap. We will be leaving the backside C-gap defender or in this case the defensive end unblocked. Against this five man front we should be able to get a five on four advantage in the run game (Diagram 7). Our H-back will execute an arc block technique where he will release outside of the defensive end and will arc block the most dangerous threat to the play from inside-out (Diagram 8). We will be expecting one of the safeties to invert vs. the jet sweep action. It should also be noted in our offense that we place the defensive end in constant conflict with false keys and reads to force him to play slow. The quarterback will time up the snap for our jet motion fake and will bring the ball back deep to ride the tailback on the inside zone read. He is reading the defensive end for a pull or give read. If the defensive end comes upfield or widens with the arc block of the h-back, then the quarterback will give the football (Diagram 9). If the defensive end crashes the b-gap he will pull and attack the force defender which will potentially be the safety who has inverted with the jet motion. This defender becomes the pitch phase of the play where he has the opportunity if he is forced quickly to pop the ball out to the receiver who has run the jet motion and has gotten into a relationship with the quarterback on the numbers for the pop-out pass. If the force defender has widened with the jet motion receiver the quarterback will keep the ball in the alley for a good gain (Diagram 10). We feel confident in this play call to give us an opportunity to get close to the sticks for a manageable fourth down play call or potential field goal attempt if it is within the range of our placekicker.
Diagram 7 Diagram 8 By defensive design our DEs will get upfield and after the QB as quickly as possible. As a C gap player he is responsible for the QB as the perimeter defenders will be responsible for the Jet action (Diagram 11). Diagram 11 The QB should read this as a give and now it becomes a 5 on 5 game up front. The numbers game has evened itself. Our run fits are as follows (Diagram 12): DE C gap. He will playing fast and upfield because of the Sick Em call. He should immediately redirect and squeeze the OT. Nose A gap. OCs steps will determine the gap. In this case he will work his feet and hands to the inside number of the OC to the right. Mike Playside B gap. Will Backside A gap. Diagram 12
In this situation the ball carrier should be forced to either stick the zone run or cut back since the DE will be upfield so quickly. The play of the Adjuster and the $ is critical here. $ - Alley runner. A Inside fill player. Point of reference is ALWAYS back side shoulder of the ball carrier. This is critical if we are playing as fast as we can up front. In theory the Adjuster will be unblocked and expected to finish the play. Keep the following in mind: 1) We have made a decision to play coverage in 3rd and long situations. This may change depending on what the offense does throughout the game. 2) Our game plan will be geared to the KEY player(s). Who do we need to stop? Who is the biggest threat we refuse to let beat us? 3) Field position, time remaining etc. are always factors that will determine whether we bring pressure or play coverage in long situations. Forcing an inside zone run scheme in 3rd and long is a win for us.
Diagram 9
Diagram 10
|

|
| HOME |
MAGAZINE |
SUBSCRIBE | ONLINE COLUMNISTS | COACHING VIDEOS |
Copyright 2025, AmericanFootballMonthly.com
All Rights Reserved


